Vue lecture

Il y a de nouveaux articles disponibles, cliquez pour rafraîchir la page.
✇SharePoint Maven

How to configure Search Verticals on a SharePoint site

Some time ago, I introduced you to the ability to alter SharePoint search settings in modern SharePoint. There are a few ways to customize search results, and one of the things you can adjust is a Search Vertical. So in today’s post, I would like to explain what a Search Vertical is and how to configure Search Verticals on a SharePoint site.

What is a SharePoint Search Vertical

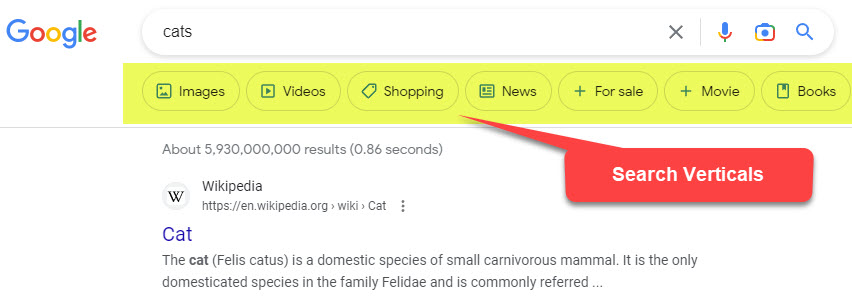
A search vertical is a subset of search results you get when you search for something in SharePoint. You know, when you search for something on Google and get a bunch of results, you can filter them into different types by clicking on different tabs available under the search box (i.e., News, Images, Videos, etc.)

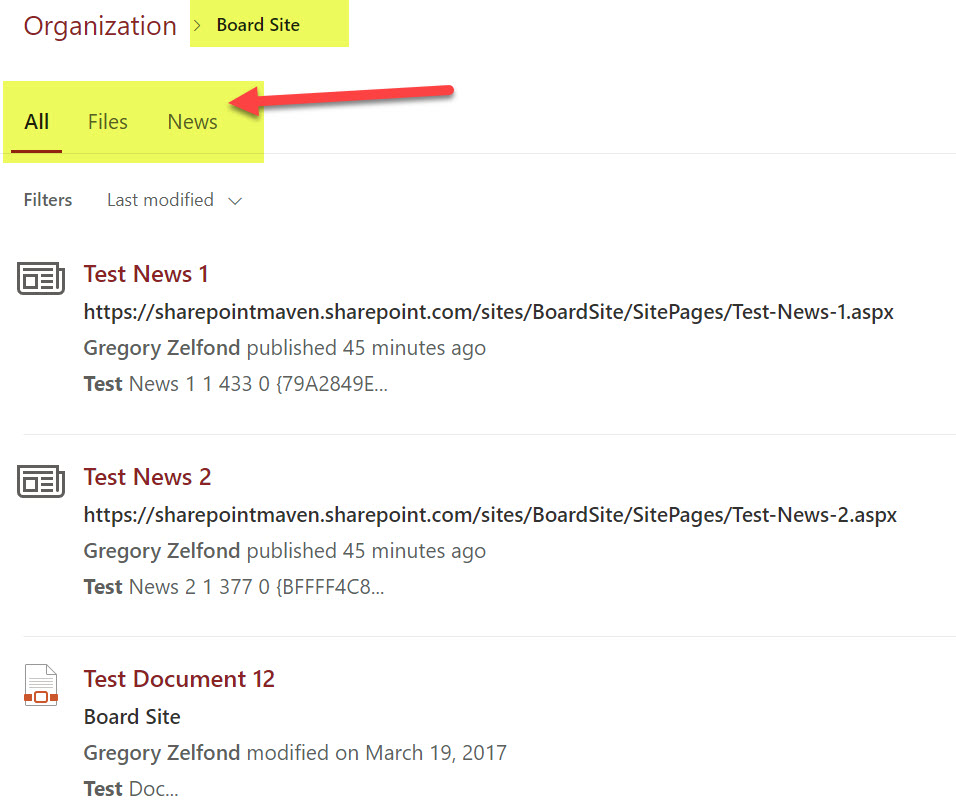
We have the same capability in SharePoint as well. When you search for something in SharePoint, you get a bunch of results. However, you can also separate them into more relevant categories (Files, Sites, News, Images) by clicking on appropriate tabs. So, for example, if I am searching for a keyword and just want to limit results to files, I will click on the Files tab. If I want only to search for news and announcements, I will click on the News Tab.

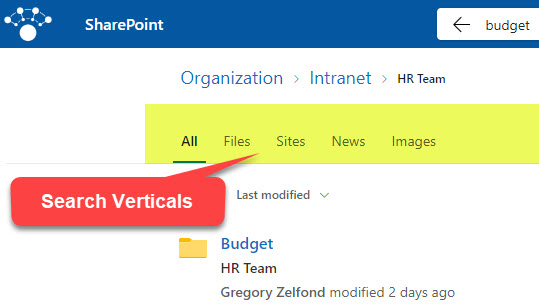
To summarize, SharePoint Search Verticals are tabs that allow you to filter results and present results based on some filter/parameter/scope.

Where can you configure SharePoint Search Verticals?

Just as I mentioned in an earlier post, you can configure SharePoint search in two places:

  • SharePoint Site
  • Tenant (Global) Level

Since the steps for both locations are almost identical, I will demonstrate how to configure SharePoint Search verticals at the site level. So if you are a Site or Team Owner, you can easily follow the below instructions.

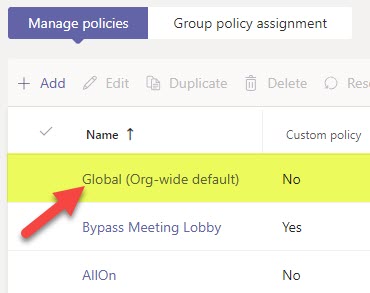
To alter SharePoint Search Verticals at the global (tenant) level, you would need to adjust those verticals within the Search & Intelligence Admin Center, and you also need to be a global Microsoft 365 Administrator to do so.

An example of Search Verticals Customization area within the Global Search & Intelligence Center

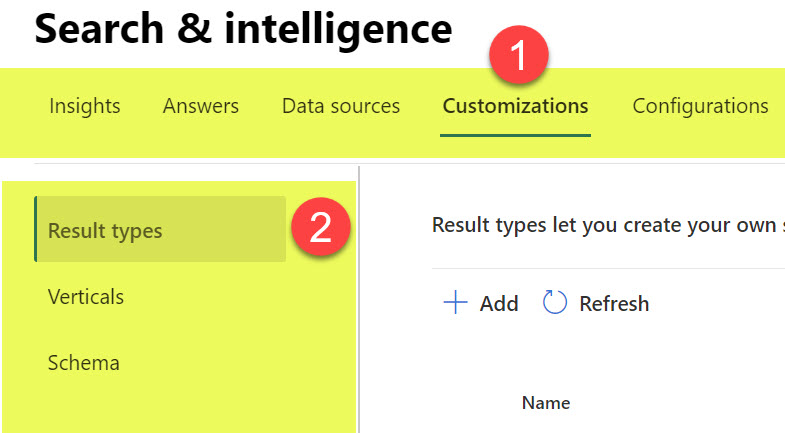
An example of a Search Verticals Customization area within the Global Search & Intelligence Center

How to configure Search Verticals on a SharePoint site

Make sure you are the Site Owner of a given site. If you are a regular site member, you would be unable to customize this.

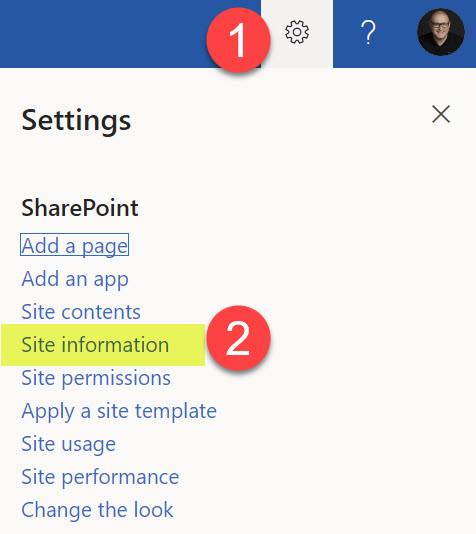
  1. On a given SharePoint Site, click Gear Icon > Site Information
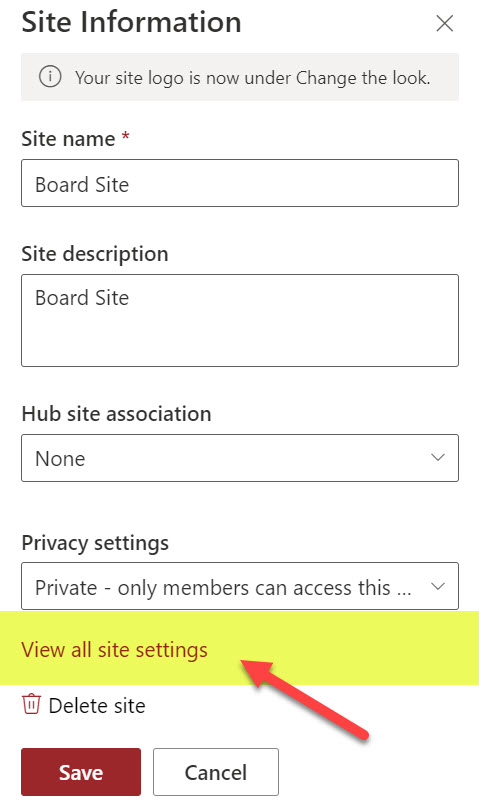
  2. Click View all site settings
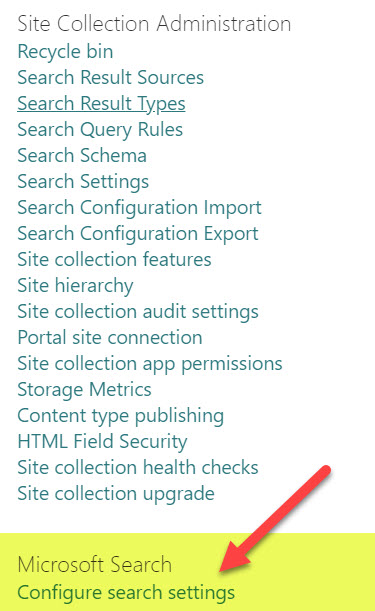
  3. Click Configure search settings under Microsoft Search
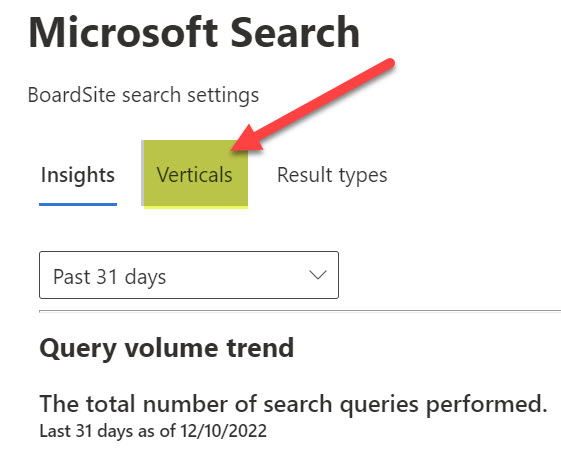
  4. Once you click on the Configure search settings, it will show you the default Microsoft Search Settings page and will default to the Insights page. Click on the Verticals tab to get into the Verticals customization page.
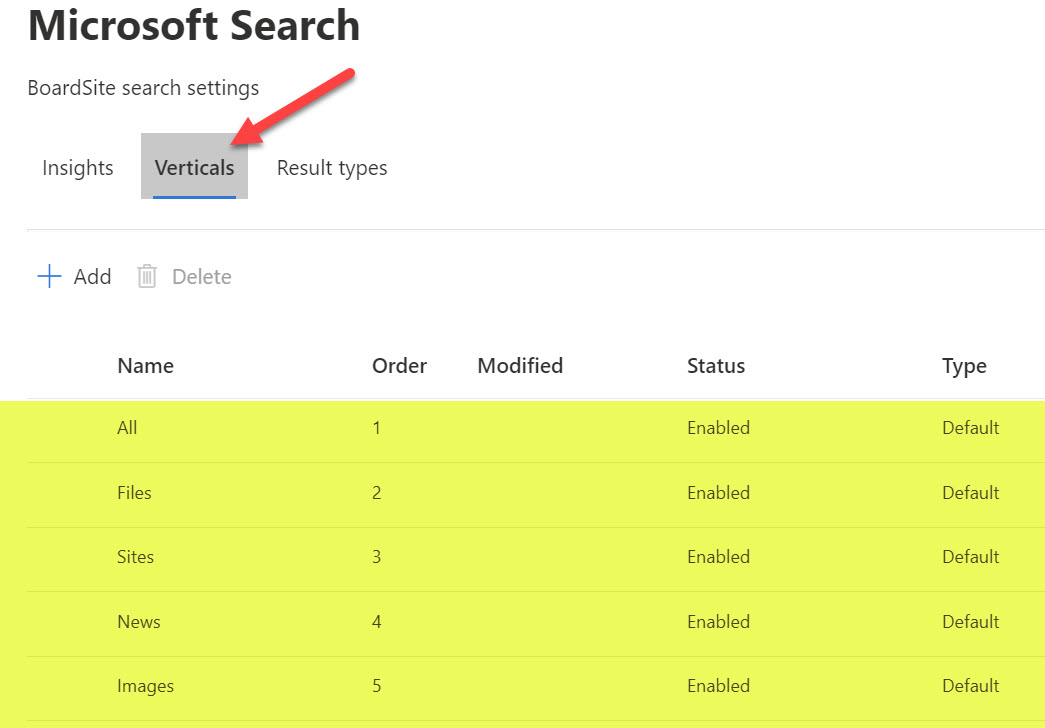
  5. Once you click on the Verticals Tab, it will show you the default Vertical Tabs available when a user searches for something on a SharePoint site

How to disable the default Search Vertical

By default, it shows the 5 verticals shown above. However, you can disable some of them if necessary. Here is how to achieve this:

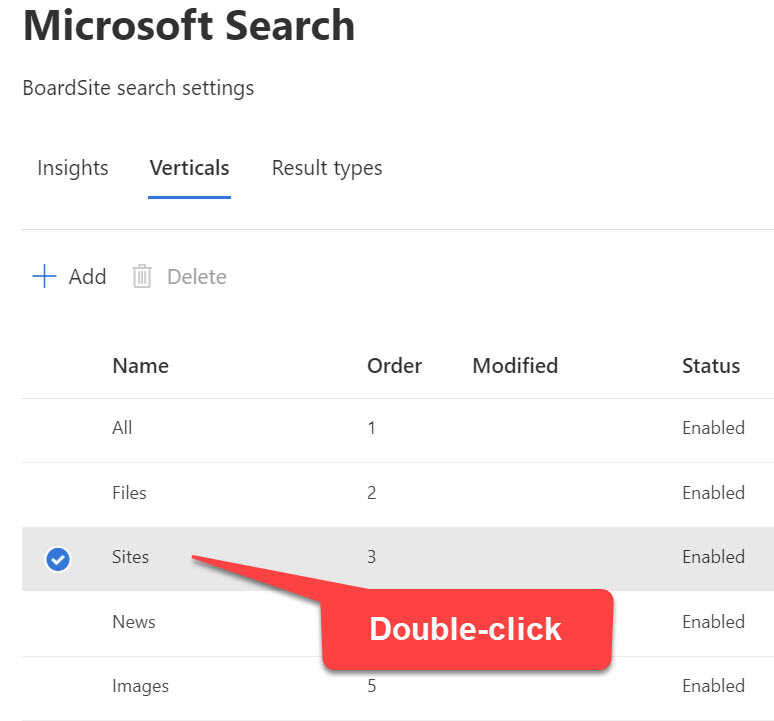
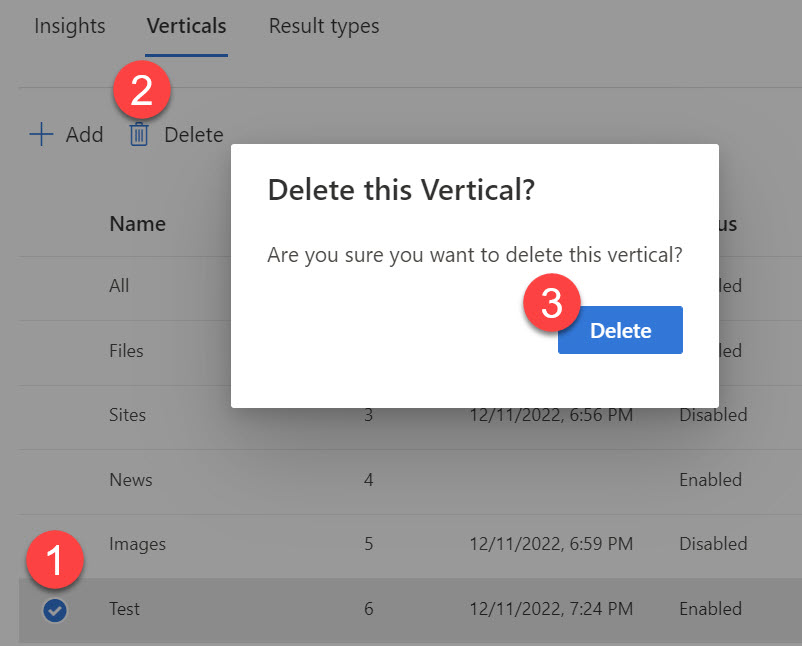
  1. Double-click on a vertical you would like to disableSearch Verticals on a SharePoint site
  2. Click on the Edit button
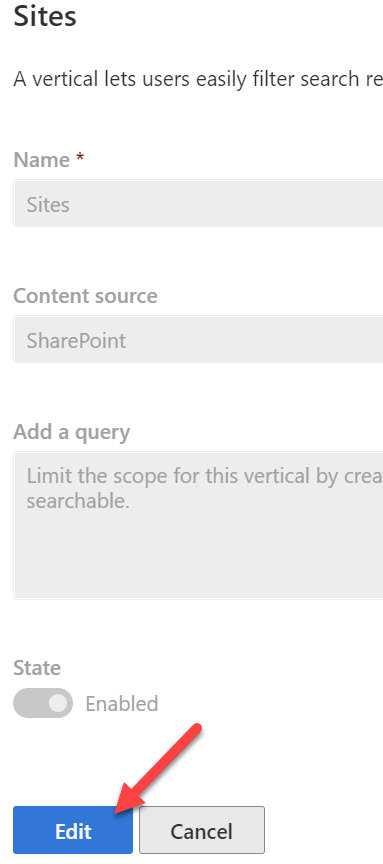
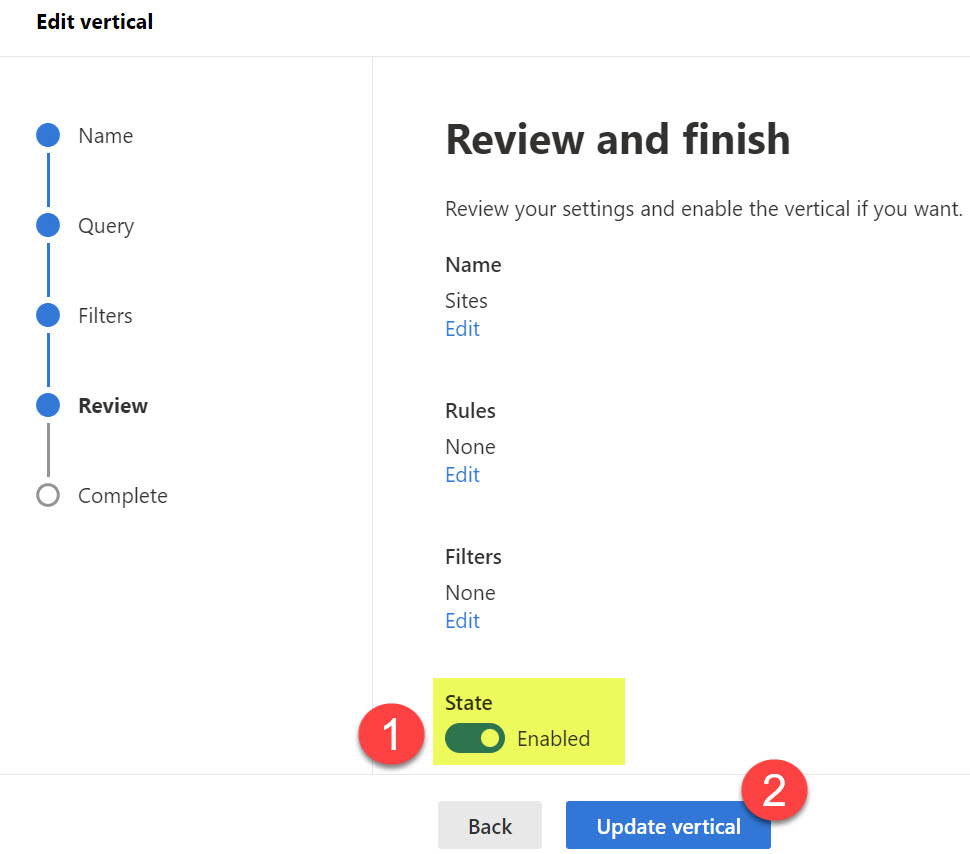
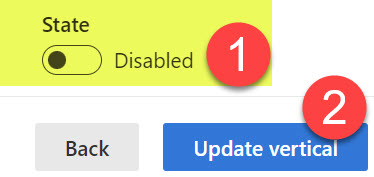
  3. Click on the State toggle to disable the vertical, then click on the Update vertical button
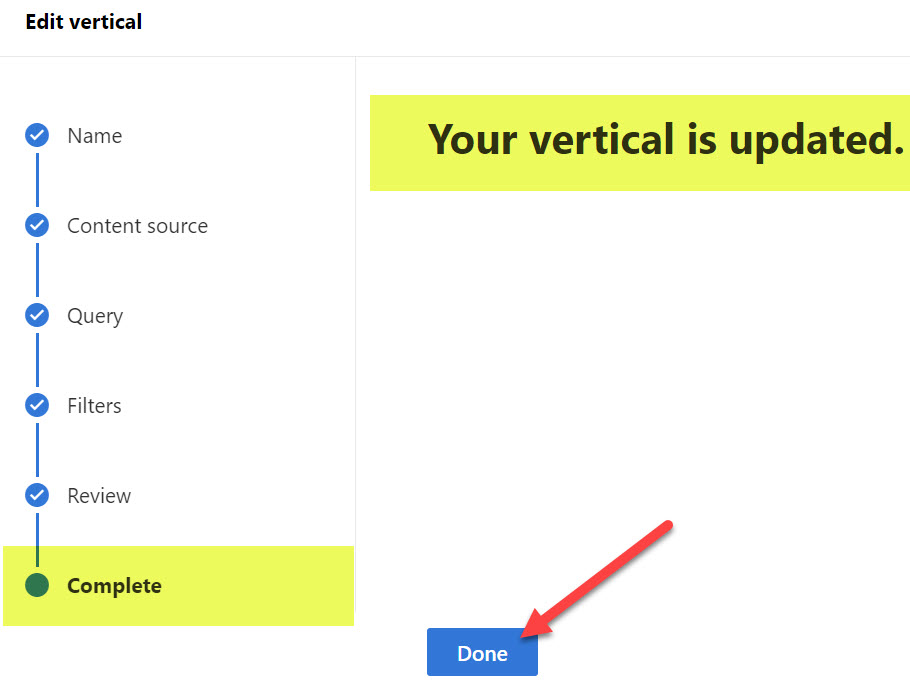
Search Verticals on a SharePoint site
  4. Click Done
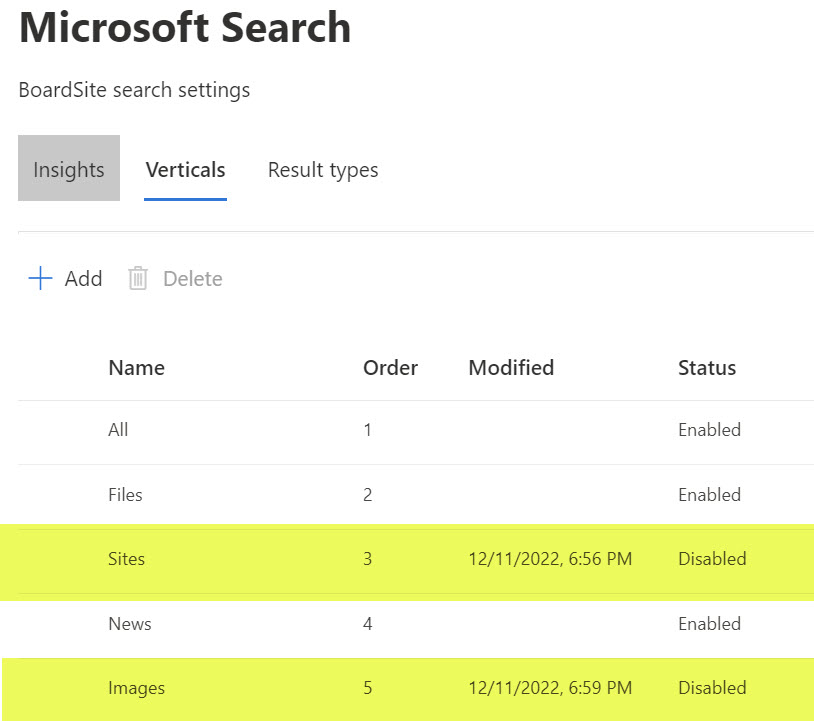
  5. The table of SharePoint verticals will now display your customizations. For example, in my case, I disabled Sites and Images Verticals.Search Verticals on a SharePoint site
  6. It might take 1-2 hours for a change to take place. Here is the end result (all the disabled vertical tabs are gone when the user executes the search at the site level)

Just a note, there are other ways to configure and customize the vertical. For example, you can customize the default vertical by adding a custom filter. I will demonstrate how to do so below, where I provide instructions on creating a custom vertical.

How to create a custom search vertical on a SharePoint site

You might also have a scenario where you would like to create a custom search vertical that will filter for a certain type of results. To take advantage of this capability, you must get familiar with Keyword Query Language and Managed Properties. It can get pretty sophisticated in terms of custom verticals you can create so that I will use a simple example for this demo. I would like to create a custom search vertical that will only show/filter results that are PDF file type and only contain the word “blue” in the file name.

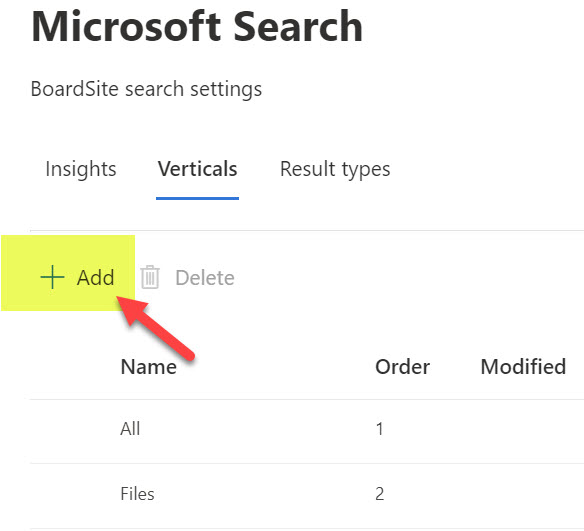
  1. Navigate to the Microsoft Search Settings screen, as shown earlier in the post
  2. Click + Add buttonSearch Verticals on a SharePoint site
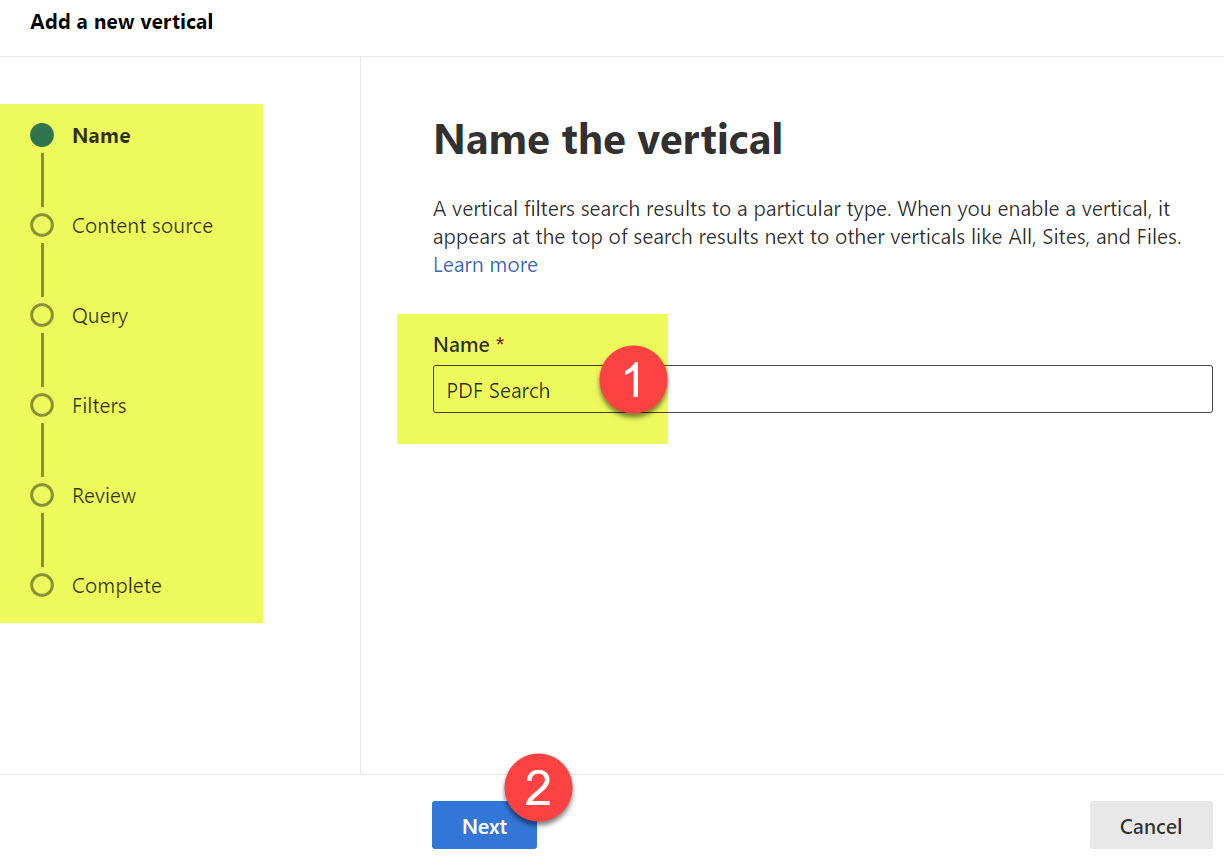
  3. To create a vertical, you must supply several pieces of information. The first one is the name of the Vertical (Tab) you are creating. Give it a name and click Next.Search Verticals on a SharePoint site
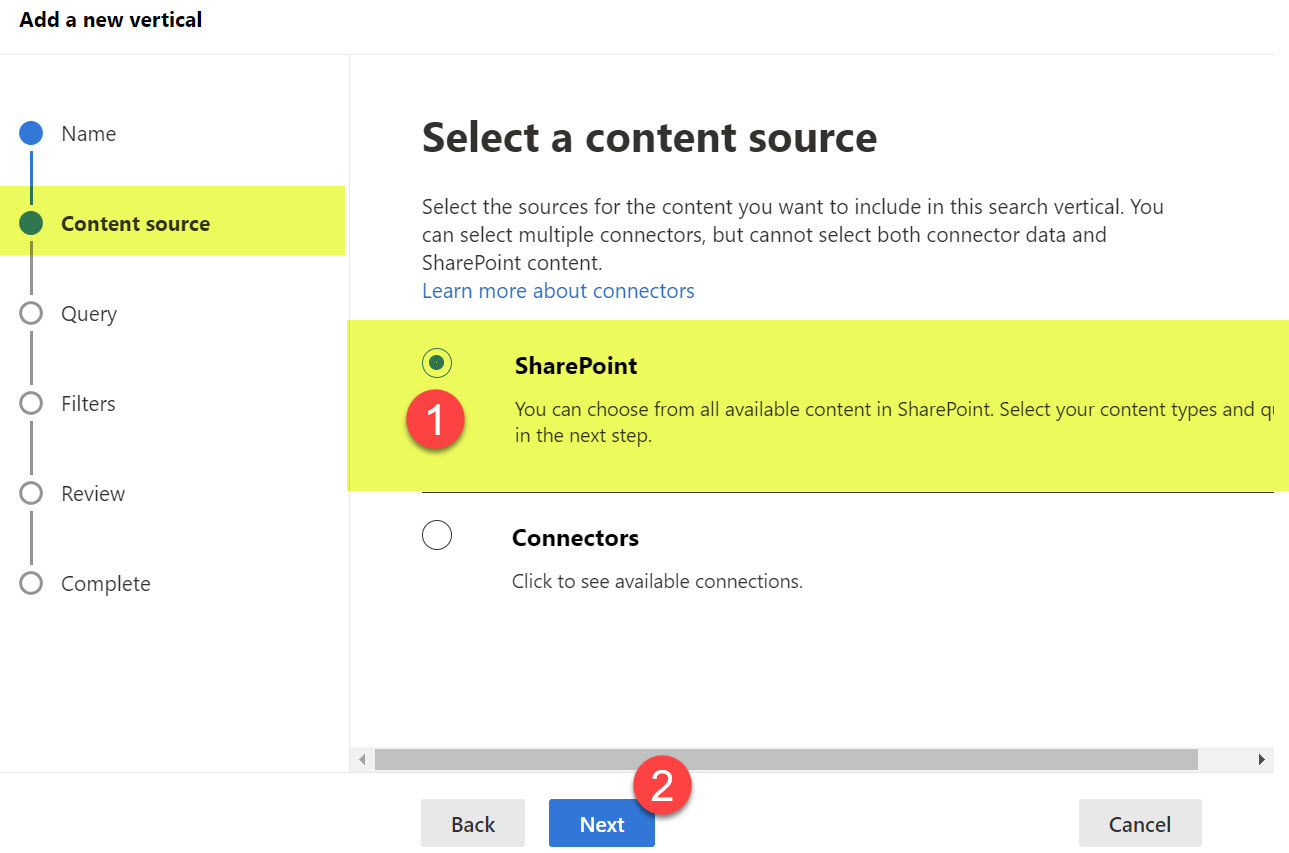
  4. Next, choose the source of the content. Just click the radio button next to SharePoint, then click Next. There are ways to bring in other, non-SharePoint sources (i.e., 3rd party databases, CRMs, etc.), but this is pretty advanced and is a task for your IT Team. In our case, we will bring content just from SharePoint.
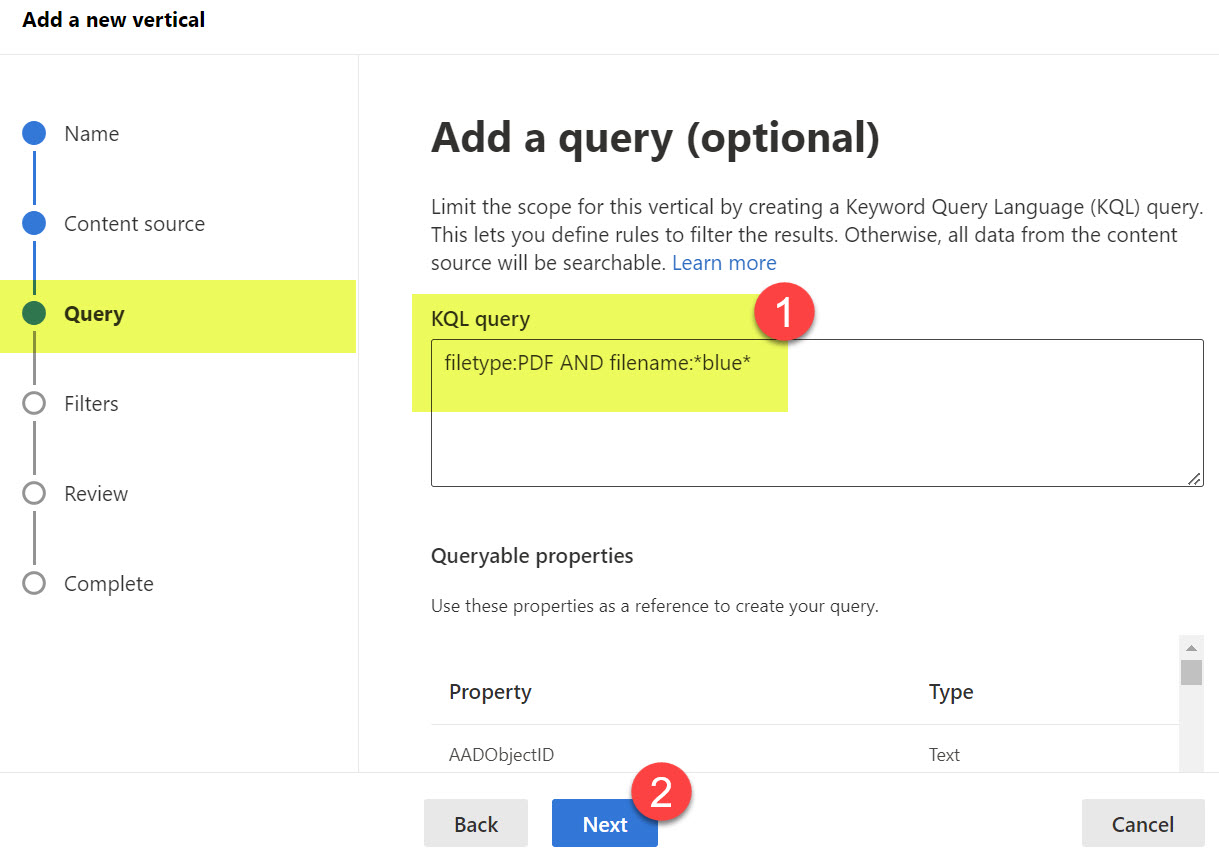
  5. Next, you need to specify a KQL query that will filter the results to certain ones. Again, I suggest you get familiar with Keyword Query Language (KQL) and managed properties to see what is possible. To help you understand which properties can be used for the KQL query string, it actually lists all the managed properties under the Queryable properties section.
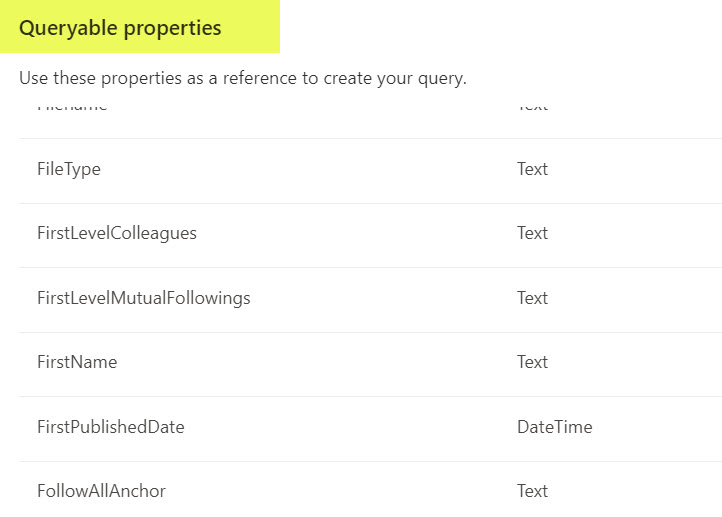
  6. In my case, the KQL String looks like this: filetype:PDF AND filename:*blue*, which limits results to PDFs and only searches filenames containing the word “Blue.” Click Next.
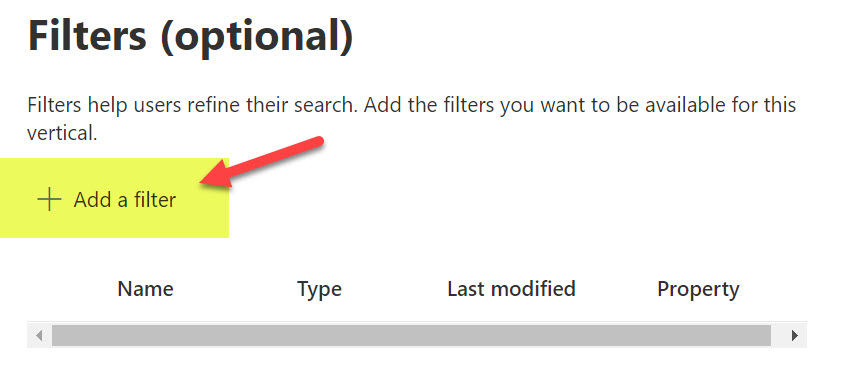
  7. On the next screen, you can choose to add an optional filter. It is not mandatory, you can skip this step, but just so that you know which filter we are talking about, it is a filter drop-down that appears under the search results, allowing users to filter results even further.
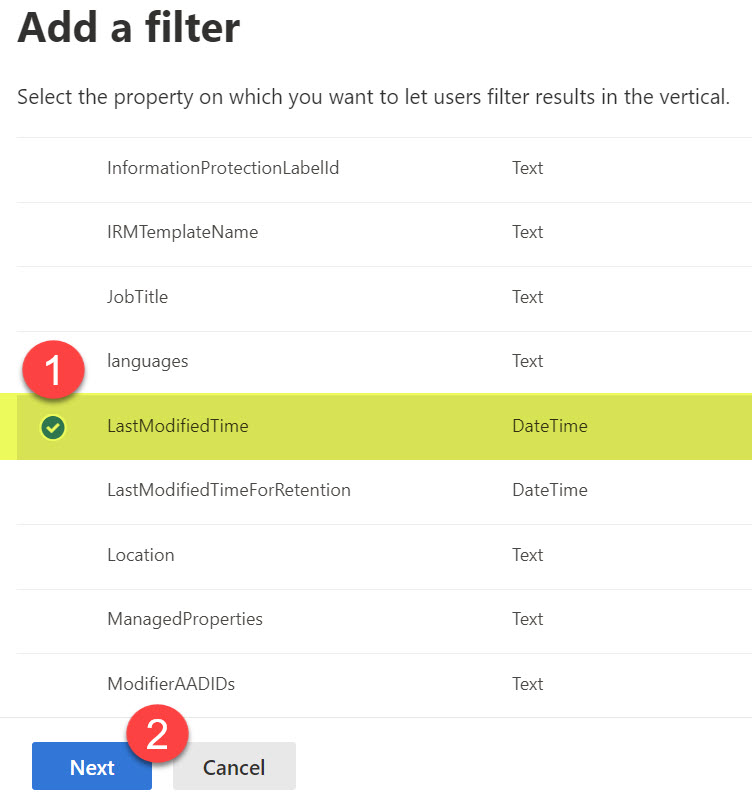
  8. If you would like to add an optional filter, click Add a filter
  9. It will list various properties/managed properties you can filter by. In our case, let’s add LastModifiedTime so users can filter further by the last modified date. Click Next.
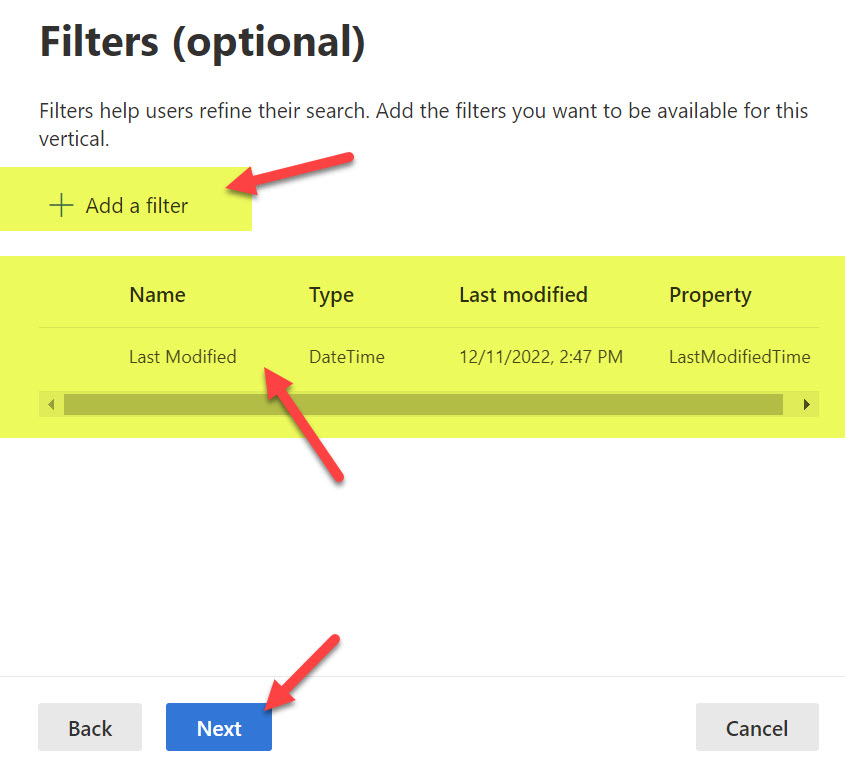
  10. Next, you can add a custom name to the filter above, then click Add
  11. You can add multiple filters, but in our case, let’s just stick to one. Click Next.
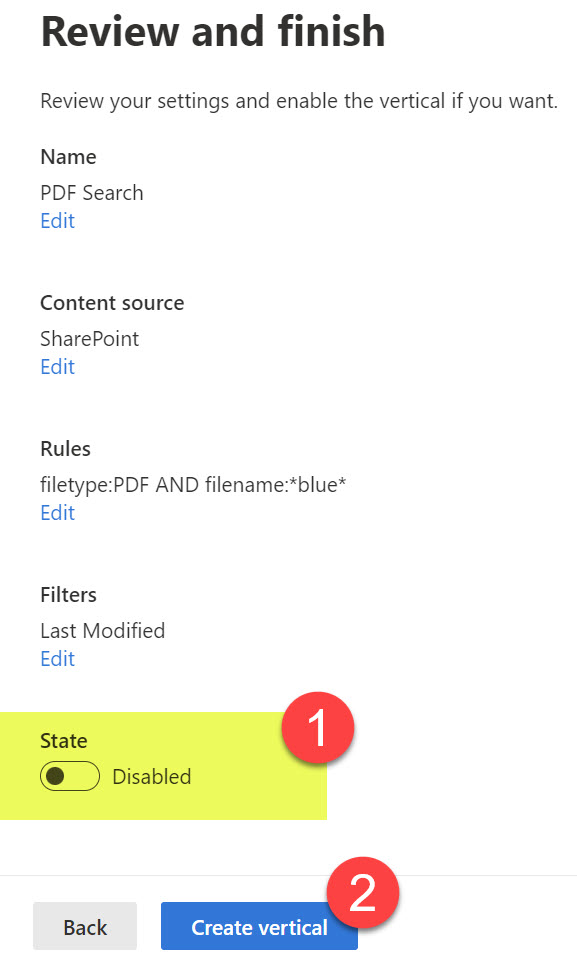
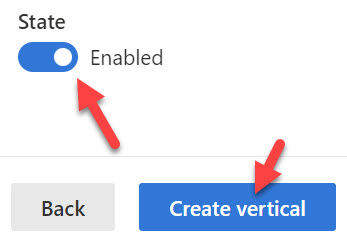
  12. On the next screen, review the changes you made. Make sure to enable the vertical (it is disabled by default), so click on the State radio button to ensure it says Enabled. Click Create Vertical button.
  13. You will get a Vertical created Confirmation Message. Click Done.
  14. This is what the end result will look like in the Verticals configuration screen
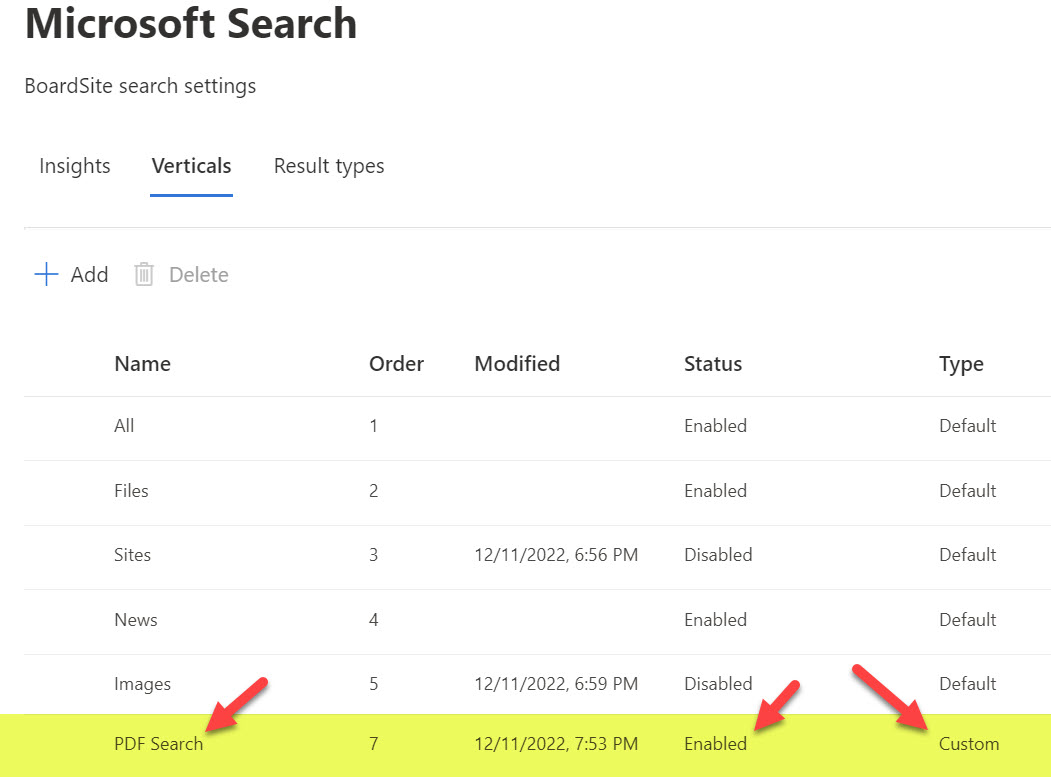
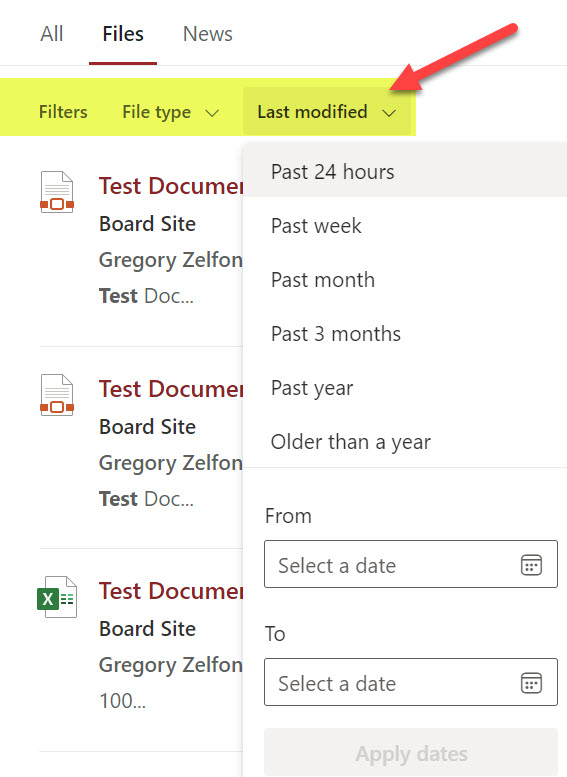
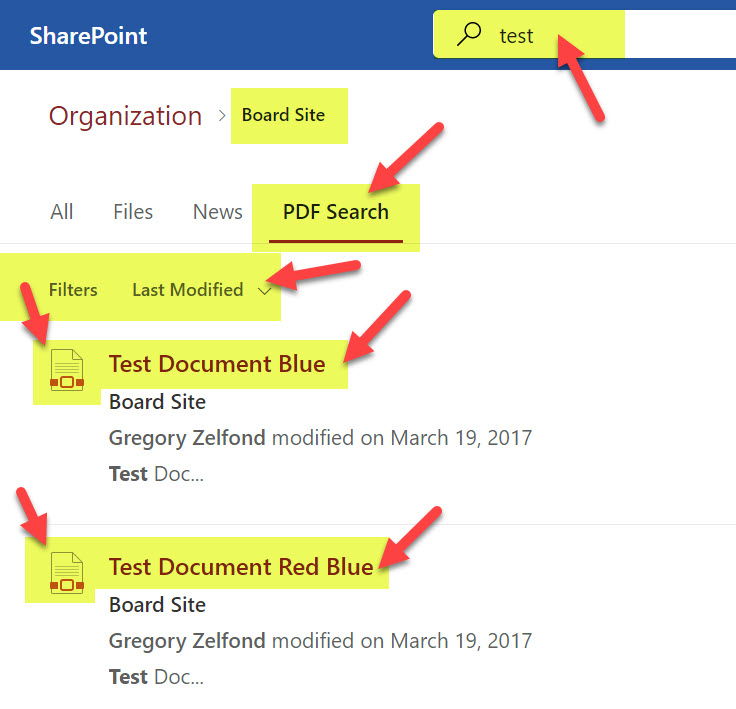
  15. It might take a few hours for the Vertical Tab to appear when you/users execute a search. Here is the end result. You will notice a custom tab created when I do a keyword search. Since we customized our search to only show PDFs and files that contain the word “Blue” – that is precisely what appears when you click on the custom vertical Tab. In addition, we also have the Last Modified Filter as well.

Important Notes about Search Verticals on a SharePoint site

  1. You cannot delete default verticals/tabs (All, Files, Sites, News, Images); you can only disable them. You can only delete custom (new) verticals/tabs created by you.
  2. As indicated earlier in this article, you can also create a custom search vertical in Search & Intelligence Admin Center that will impact global search results. But this requires you to be a Microsoft 365 Global Admin role.

The post How to configure Search Verticals on a SharePoint site appeared first on SharePoint Maven.

✇SharePoint Maven

How to disable the creation of private and shared channels in Microsoft Teams

Some time ago, I introduced you to various channels we have in Microsoft Teams. This post specifically focuses on the two channel types we have in Teams: Private Channels and Shared Channels. Both channels allow for secure conversations and file storage for a subset of users in a given Team. While great in theory, they do create separate workspaces and SharePoint sites behind the scenes. And in some organizations or use cases, you might not necessarily want to create those separate areas and would like to leave all the content easily accessible by users and administrators. So in such cases, we need to prevent the ability to create Private and Shared Channels, and that is exactly what this article is all about.

The issues with Private and Shared channels

These are not precisely issues; I guess more of “by design,” but when you create either a Private or Shared Channel, the following are true:

  1. It creates a separate SharePoint site altogether, independent from the main SharePoint team site
  2. Private and Shared Channels lack certain features available in Standard Channels (i.e., the ability to add Channel Calendar app, the ability to add Plan from Planner, and a few others.), making the channel use a bit frustrating to users. I explained those limitations in this article.
  3. Team Owners might end up in a situation when they are locked out of a Private or Shared Channel. For example, if a regular member creates a Private Channel and does not invite the Team Owner to it, the Team Owner won’t have access to the conversations or files stored within the Private Channel!
  4. While we can create a max of 200 Shared Channels within a Team, we are only limited to a maximum of 30 Private Channels within a team, making some of the use cases for those types of channels not relevant
  5. Additional SharePoint sites created as a result of Private and Shared channels might impact Governance rules you may have set in your organization

Long story short, there might be situations when you would like to prevent users from creating Private and Shared channels. Luckily, we do have ways to prevent the creation of Private Channels in Teams, and that’s what I want to explain to you today. You can disable Private and Shared Channel creation in two ways: Team Level and Teams Admin Level.

Team Level

Disable Private Channel creation

This option allows Team Owners to disable Private Channel creation for their particular Team. To do so:

  1. Click three dots next to the team name, then click on Manage team
  2. Click on Settings Tab, expand Member permissions and uncheck the box next to Allow members to create private channelsdisable the creation of private and shared channels
  3. The luxury of Private Channel Creation will now only be limited to Team Owners!

Disable Shared Channel creation

Unlike Private Channels that can be created by regular Team Members, Shared Channels can only be created by Team Owners. As such, there is no setting in Teams Settings for the Team Owner to disable Shared Channel creation (since this capability is only limited to Team Owners anyway).

Admin Center Level

This option allows Teams Administrators or Microsoft 365 Global Admins to disable Private and shared channel creation for the whole tenant (all teams at once).

  1. Access Microsoft 365 Admin Center by clicking Microsoft 365 App Launcher > Admin
  2. Under Admin centers, click Teams
  3. Under Teams, click Teams policies
  4. Click on the Global (Org-wide default) policydisable the creation of private and shared channels
  5. Uncheck (switch the toggle to off) next to Create private channels or Create shared channels and click Applydisable the creation of private and shared channels
  6. This will remove the ability for anyone (Team Owners or Team Members) to create Private and Shared channels within Teams

The post How to disable the creation of private and shared channels in Microsoft Teams appeared first on SharePoint Maven.

✇SharePoint Maven

How to change the expiration date for Teams Meeting Recordings

One of the housekeeping items I encourage individual users and Admins to do is adjust the duration that Teams recording is kept in SharePoint/OneDrive. Many users assume it is kept there indefinitely, but this is not the case. Video files take up quite a bit of storage space. Multiply each file by the number of meetings you have, and you get the idea. Luckily, there is a way for both Admins and individual team members to adjust the duration/threshold, and that is what I want to explain in this post.

Default Expiration of the videos

First, it is important to note that Teams recordings are now saved in New Stream (Stream on SharePoint). Click here to learn more about the differences between Stream Classic and Stream on SharePoint. The default video threshold is 120 days from the recording date. After that, the video will be deleted and end up in the SharePoint Recycle Bin, where it will stay for 93 days and then will be purged forever.

An example of an email sent to the user once the Teams Recording stored in their OneDrive is expired and deleted

How to change the expiration of the individual Teams Meeting recordings

If you just ended the Teams meeting, recorded it, and want to extend the duration of the recording beyond 120 days, you have a few ways to do so.

Option 1: Access the recording from Microsoft Teams

  1. Click on the video from the Microsoft Teams interface
  2. You will see the video player open in SharePoint Online and will see the default expiration settings as well
  3. To change the expiration date, click on the Expiration box above and change the date accordingly. You can extend it by a certain duration, set it to expire on a certain date, or remove the expiration date altogether.Teams Meeting Recordings

Option 2: Access the recording from SharePoint

Since all the video recordings are stored in either SharePoint or OneDrive, you can also change the expiration date from the SharePoint side. By default, the meeting recording is saved within a channel folder in the Recordings subfolder.

Teams Meeting Recordings

To change the expiration date for Teams Meeting Recordings in SharePoint:

  1. Click the checkbox next to the video recording, then open up a Document Information Panel by clicking “i” in a circle
  2. Once you do the above, you will see the Document Information Panel (DIP) open up on the side that will show the default expiration as well
  3. Click on the expiration date field to change itTeams Meeting Recordings

How to change the expiration date policies for Teams Meeting Recordings in the Teams Admin Center

As a Teams Administrator, you can adjust the default duration for Teams Meeting Recordings. Here is how to achieve this.

  1. Navigate to Microsoft 365 Admin Center by clicking on the Microsoft App Launcher > Admin
  2. Under Admin centers, click on Teams
  3. Under Meetings, click Meeting policies
  4. Click on the Global (Org-wide default) policy
  5. Scroll down to Recording & transcription section. There, you will be able to either disable meeting recording expiration altogether or change the default expiration duration.Teams Meeting Recordings

The post How to change the expiration date for Teams Meeting Recordings appeared first on SharePoint Maven.

❌